Photo guide for authentication
How to take photosfor an expert legit check.
8 shots are usually enough. Follow the list and the expert is less likely to ask for more photos. Shooting takes about 5 minutes.
up to 20 photos per item


Do / don't

- Soft daylight, no flash
- Sharp focus — every detail visible, no motion blur
- Plain neutral background — table, floor, bedsheet
- The detail fills ≥ 70% of the frame
- Tag / label shot dead-on, perpendicular
- No filters, cropping or post-processing

- Photos with flash, glare on the tag/print
- Soft focus — you can't read the font
- Backgrounds from social media, someone else's watermarks, screenshots
- Item being worn — we need it laid flat or on a mannequin
- Cropping tight on the tag — we need both the tag and context
- The seller's photos — we need yours
8 key shots
What to shoot
Order doesn't matter. Miss any of the first seven and the expert will likely ask for more photos; the eighth is optional.
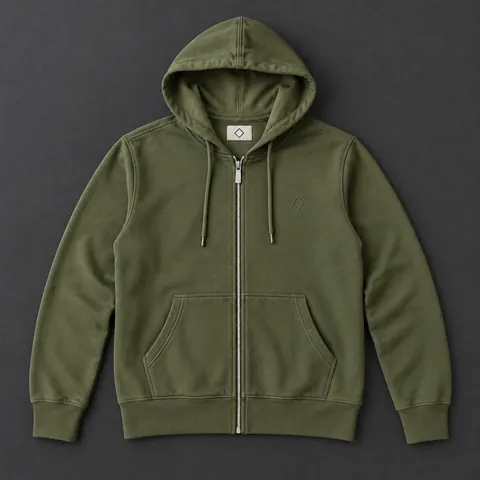
Full view
The whole item, front, laid out on a flat surface. No wrinkles — straighten the sleeves and the hem so the cut is visible.
1 photo · daylight · background ≠ fabric
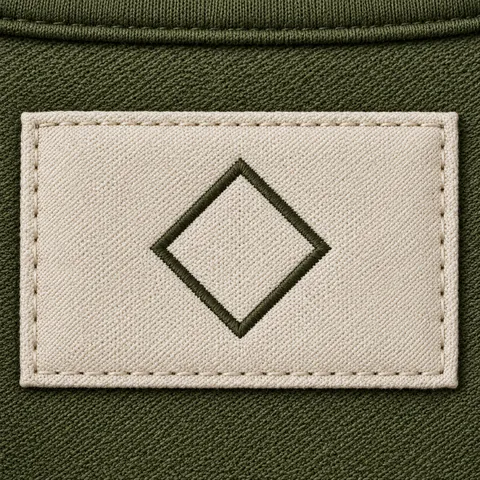
Brand tag
Macro of the main brand tag. Font, stitch density and edge finishing all have to be readable without zooming in — that is how the expert pins down the season.
macro · straight-on angle · ≥ 1500px
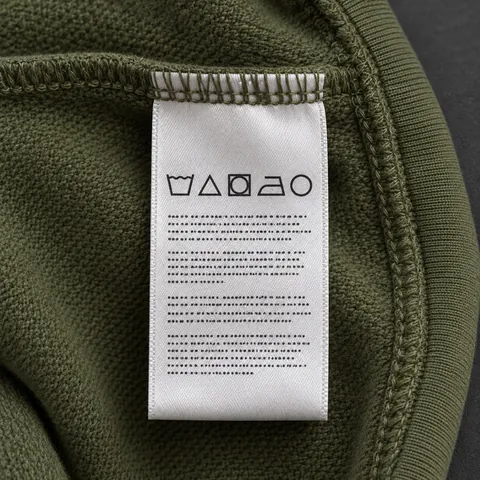
Inner label
Size, materials, country and the RN and CA numbers — the manufacturer’s registration numbers. Flatten the label out and shoot it in even light so the digits read.
RN and CA readable · no glare
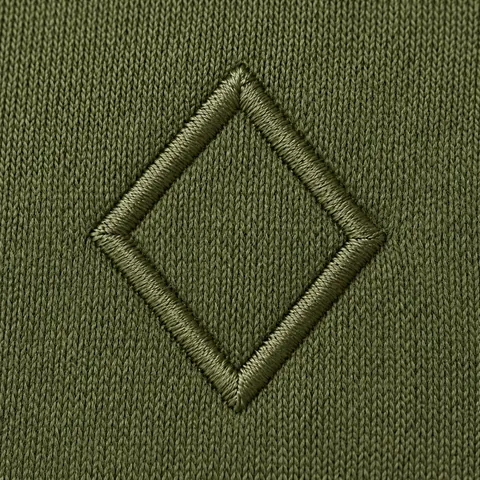
Print or Box Logo
The item's main graphic element. If it's embroidered — macro of the corners: tension, stitch density.
stitch corners · side lighting
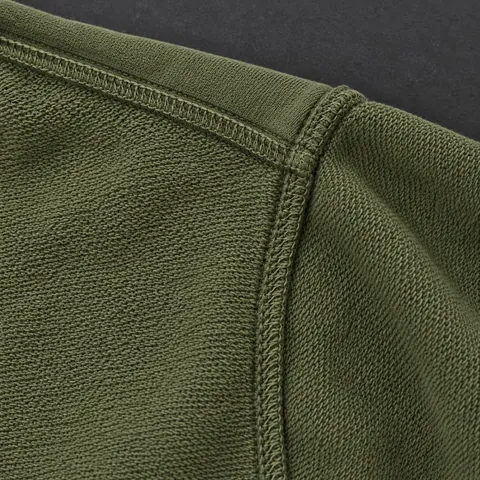
Seams and overlock
Inner shoulder or hem seam plus the overlock. Show how the edges are folded and finished, and whether the stitch length stays even.
from below · shoulder seam
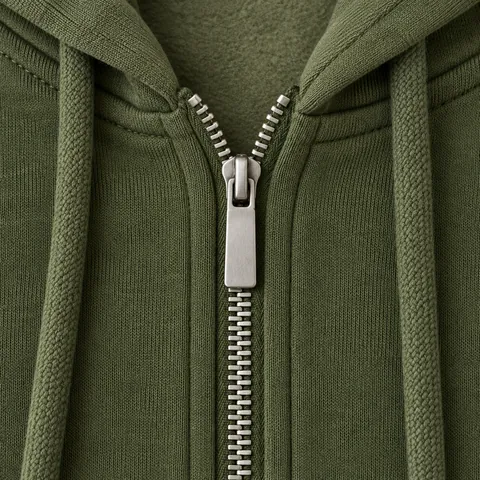
Zipper, buttons, rivets
Engraving on the zipper pull, logo on the buttons, how the rivets are set. Shoot macro — hardware branding often settles the question on its own.
zipper pull · inner side
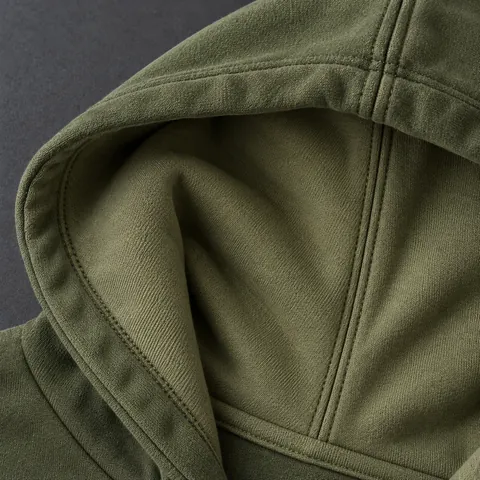
Lining / inside
The inside: texture, weave, seam finishing. If there's a lining, get a close-up of it too, including where it is stitched in.
texture visible
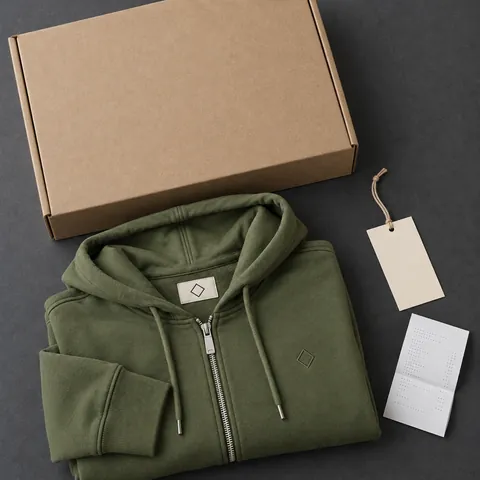
Packaging, receipt, tags (if any)
Optional, but it makes the check a lot easier: box, hangtag, retailer receipt, store stamp.
optional · helps a lot


What to shoot for each brand
Some brands have their own markers. Capture them and the expert won’t need to come back for extra shots.
Supreme
- Box Logo: embroidery corners, density of the red fill
- FW/SS tag — font and where the year sits
- RN: 87790 — must be readable on the label
- Champion zipper — engraving on the back
Nike / Jordan
- Size tag (Made in / style code / production run)
- Jumpman: proportions, line thickness
- Stitching along the toe box, glue along the sole
- Box with label and QR/barcode
BAPE
- Shark Hoodie: teeth, nose — proportions and seams
- Inner camo — the pattern lines up
- YKK zipper — engraving
- Hangtag with hologram
Off-White
- Industrial tag — font and print density
- “Stripes” — proportions and angle
- RFID tag (if present) — shoot the area
- Quotation marks on prints — thickness and kerning
Palace
- Tri-Ferg: triangle corners, sharpness
- FW/SS season tag — font
- Inner label with RN
Stone Island
- Compass patch — stitching and button attachment
- Inner label — materials and country
- Company certificate (if it came with the item)
Frequently asked questions
Can I shoot on my phone?
Yes, any modern phone works — you don’t need a separate camera. What matters is daylight, sharp focus and a resolution no lower than 1500 pixels on the short side.
What if I don't have the item yet — can I send the seller's photos?
No. We need your photos of the item — otherwise we can't guarantee we're checking that exact piece. With someone else's photos we can only give a preliminary consultation (not a certificate).
How many photos can I upload?
From 2 to 20 photos per item, each up to 40 MB. We recommend all 8 key shots + the brand-specific ones.
What if the expert asks for more photos?
It's free, no extra charge. Your plan's timer starts over from the moment the missing shots arrive: Standard — up to 24 hours, Priority — 1–3 hours, Express — 15 minutes.
Can I send video instead of photos?
No — right now we accept photos only. A video frame won’t show the tag font or the stitch length clearly, so shoot photos following the steps above.
Confidence in every item.
Authenticate from your phone. Upload photos, get an expert verdict and a public certificate.

